

This guide is written for WordPress developers, designers, and site administrators. It walks you through WordPress Salesforce integration using ContactIn Pro, the fastest way to sync WordPress contact form submissions directly into Salesforce as Contacts and Cases, with screenshots at every step.
The Problem
Many WordPress sites collect valuable inquiries, but the data is scattered across inboxes, form plugins, and spreadsheets. This leads to delayed follow-up, duplicate contact records, and inconsistent activity in Salesforce.
Solution
ContactIn Pro WordPress Plugin solves this by capturing every submission in one inbox, then syncing contacts and inquiry records to Salesforce through a queue with retries and logs. You get a reliable trail of what succeeded, what failed, and what needs action.
In the next steps, you will connect Salesforce OAuth, map fields, run a real test submission, and confirm end-to-end sync in both WordPress and Salesforce.
What You Need
- ContactIn Pro WordPress Plugin, installed and activated. Check
ContactIn Pro pricing and features - WordPress admin access
- Salesforce admin access
- A Salesforce External Client App for OAuth
- Your Salesforce field API names for mapping (for example:
FirstName,LastName,Email,Phone,Subject,Description) - A published ContactIn form on your site
Why Standard Contact Form Plugins Drop Leads
Most WordPress plugins handle Salesforce syncing synchronously. If the Salesforce API goes down, limits are hit, or an access token expires, your form submission fails silently, and the customer inquiry is permanently lost.
How ContactIn Pro is Different:
- Operations-Grade Queue Processing (with DLQ & Retry): Submissions land in a secure local database first before attempting transmission.
- Dead-Letter Queue (DLQ): Failed syncs are pushed to an isolated queue for safe troubleshooting, preventing system lockups.
- Idempotent 30-Day Windows: Safely retry any failed transmission without risking duplicate contact generation or duplicate records in Salesforce.
- AI Intent Classification Integration: Automatically classify incoming inquiries as Sales, Support, or Feedback on your site, then route the filtered data directly to the matching Salesforce Cases.
Setup Steps
Complete the following steps to finish your WordPress Salesforce integration.
Note: for configuration rules, shortcodes, and other developer tools, check out our full ContactIn Pro Documentation Wiki.
Part 1: Create Salesforce External Client App
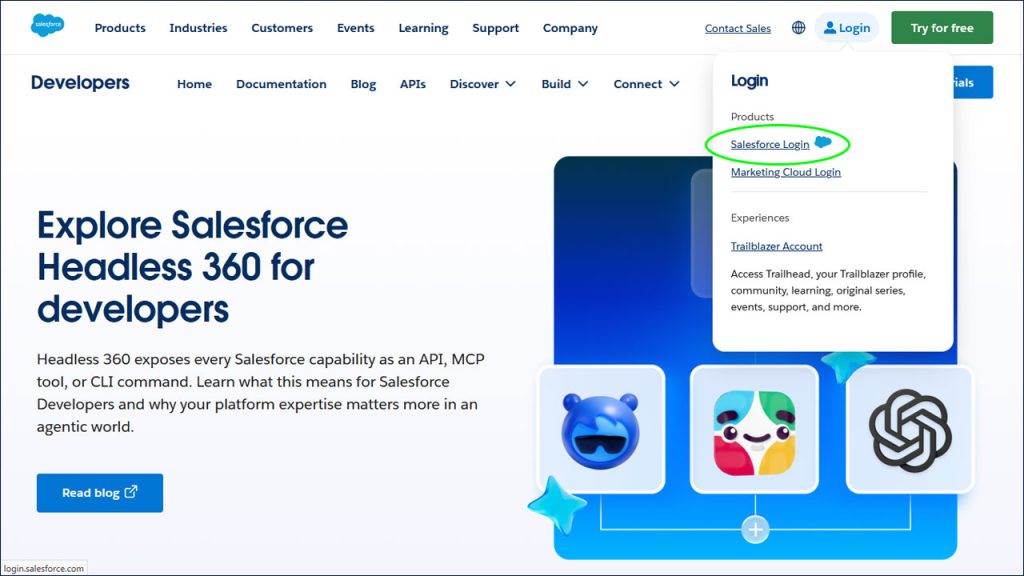
Go to https://developer.salesforce.com/, and click Salesforce Login
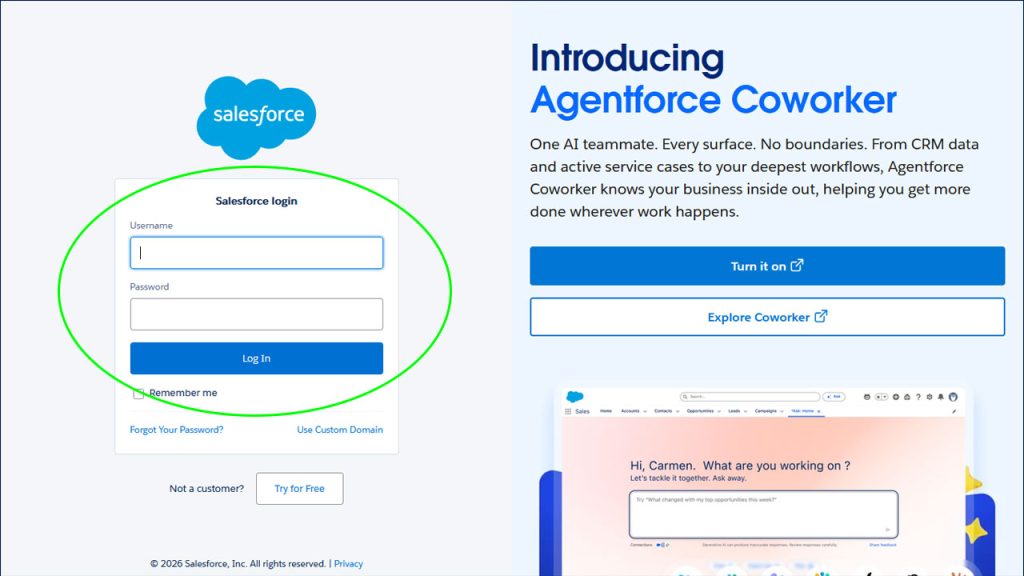
Log in with Salesforce credentials
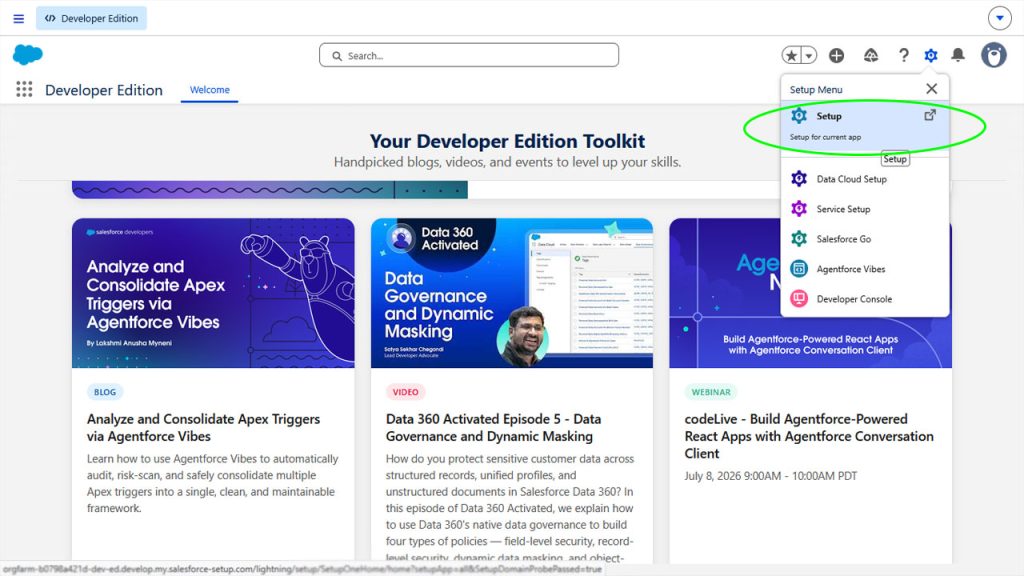
Click the gear icon on the top right, and click Setup from the menu
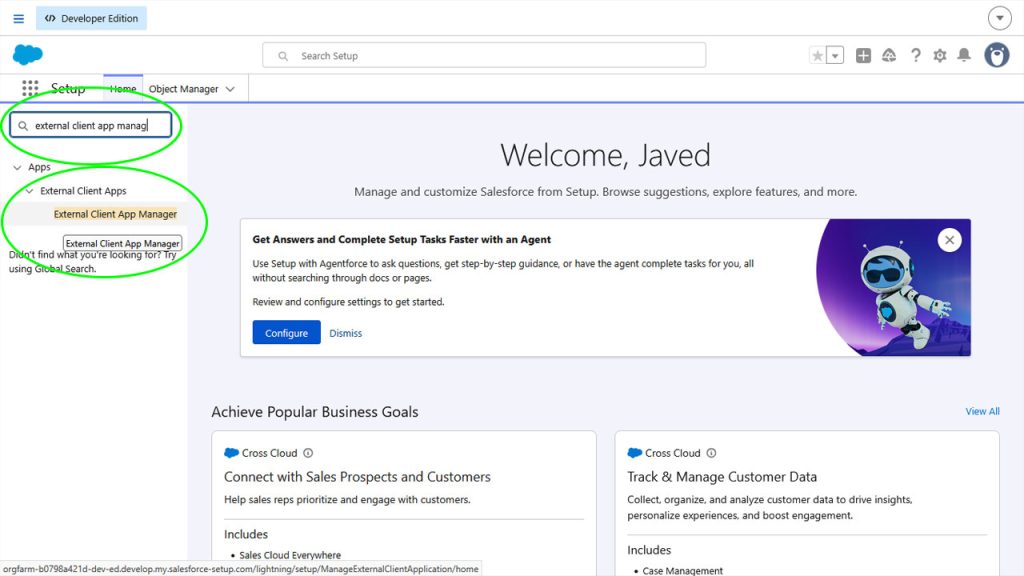
Type “external client app manager” in the menu search on the left side of the page. Click the “External Client App Manager Menu”
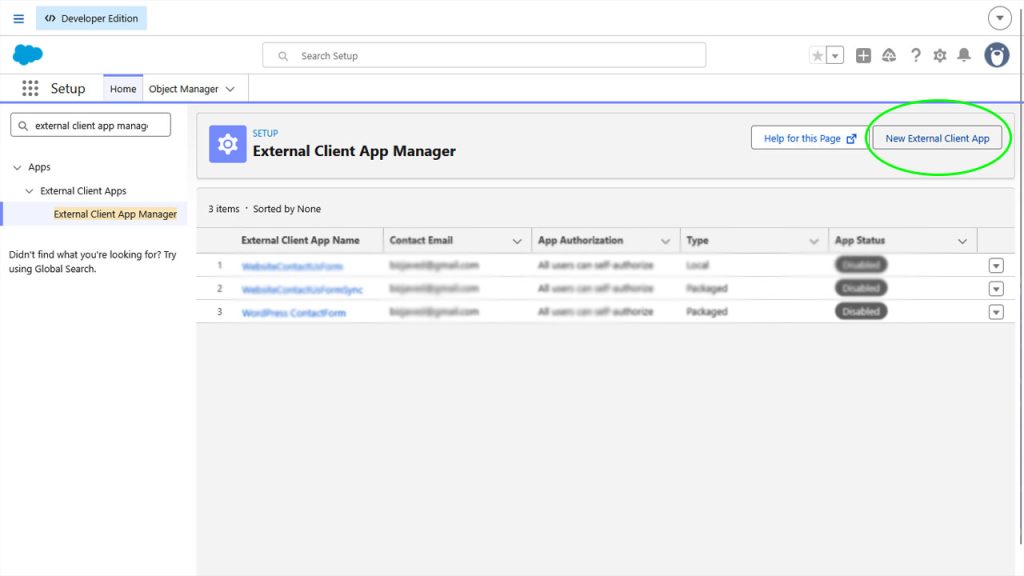
Create a new External Client App
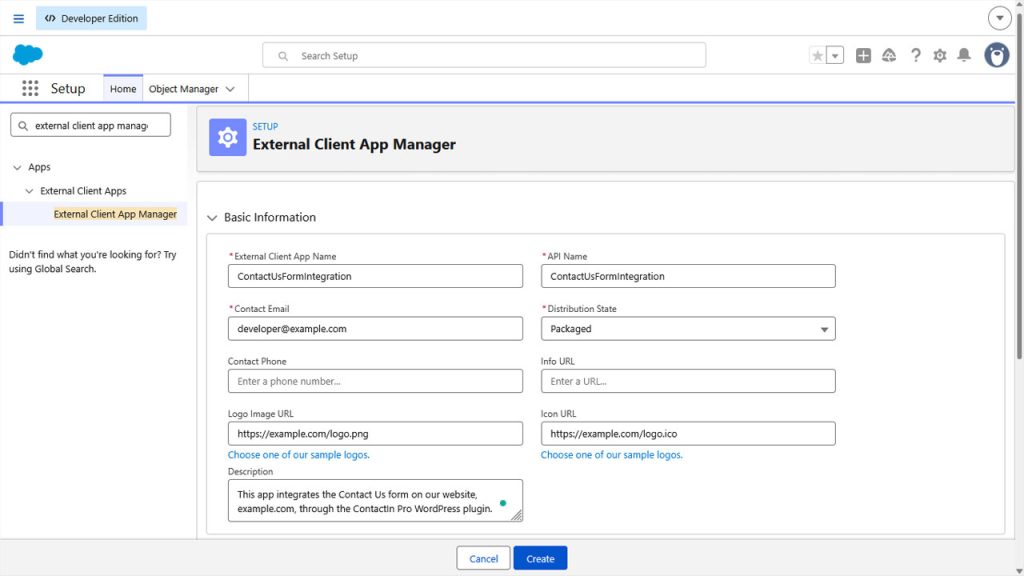
Enter the following mandatory details. You can add other details optionally.
- External Client App Name
- API Name
- Contact Email
- Distribution State: Select Packaged
Part 2: Configure OAuth Settings and Scopes
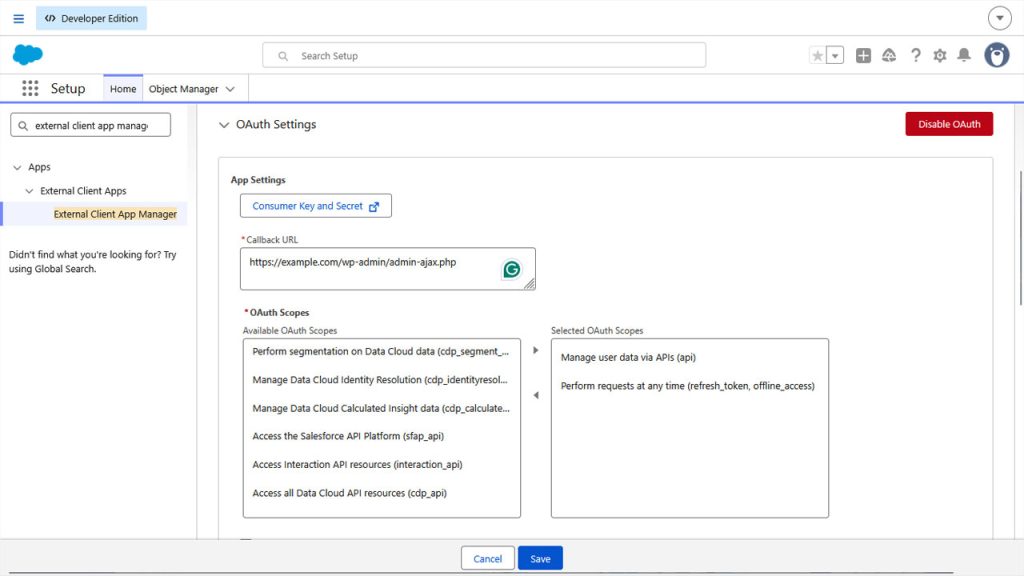
Scroll down the page and enter OAuth Settings:
- Callback Url. You can copy this URL from the ContactIn Pro: CRM Integration Page -> Salesforce Tab -> Salesforce OAuth Configuration -> Callback URL (Redirect URI)
It appears like this: https://yourwebsite.com/wp-admin/admin-ajax.php - Select OAuth Scopes:
- Manage user data via APIs (api)
- Perform requests at any time (refresh_token_offline_access)
For full details on Salesforce OAuth scopes, see the OAuth Authorization Flows.
Part 3: Configure Flow Enablement and Security
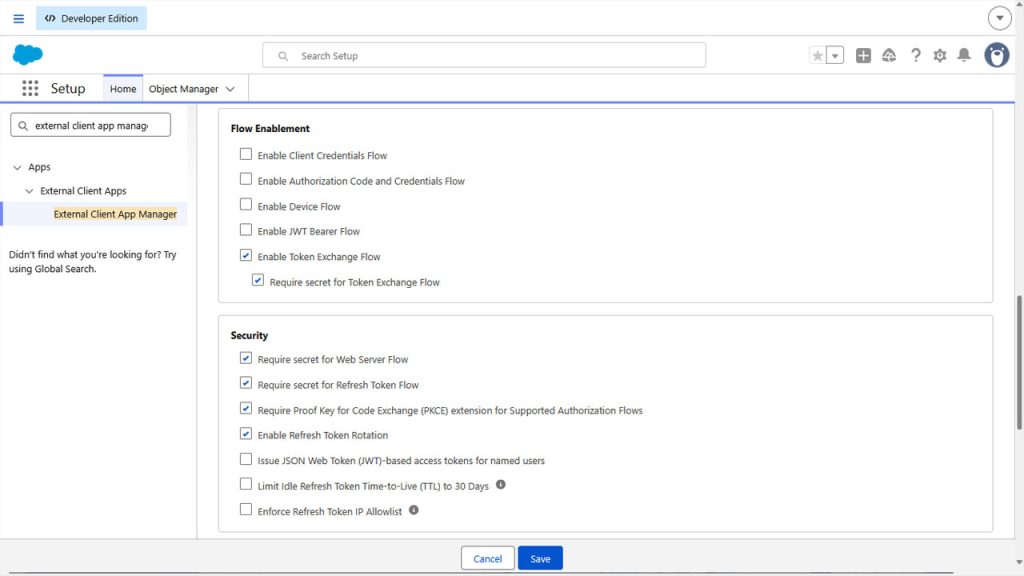
Scroll up the page to set up Flow Enablement and Security. Make sure, following are checked:
- Under the Flow Enablement, enable Token Exchange Flow
- Require secret for Exchange Flow
- Under Security, enable Require secret for Web Server Flow, Require secret for Refresh Token Flow, Require Proof Key for Code Exchange (PKCE) extension for Supported Authorization Flows, Enable Refresh Token Rotation
- Save settings
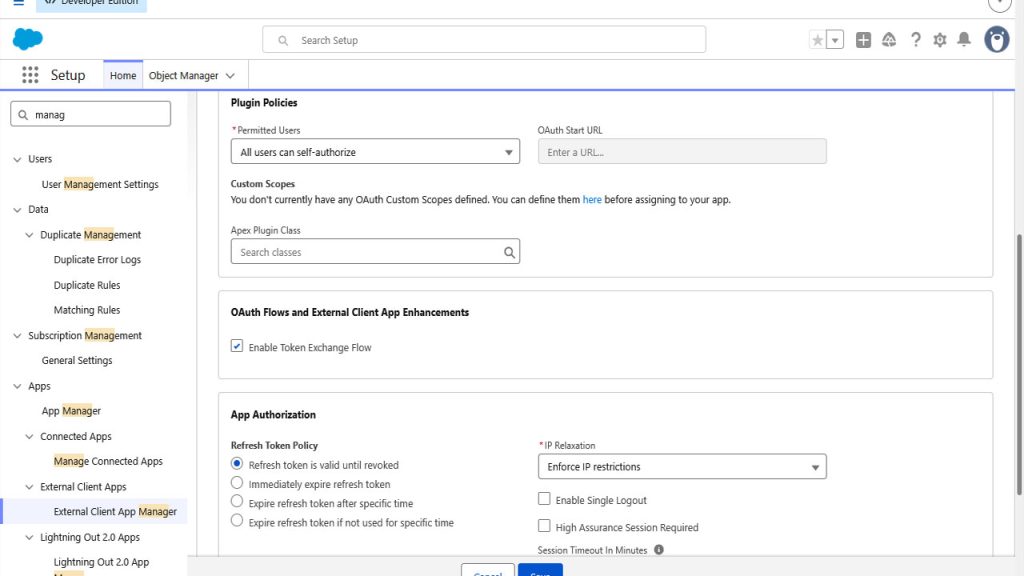
Part 4: Set OAuth Policies
Scroll up the page, click Policies tab, click edit button on right side, and expand “OAuth Policies”. Make sure:
- Enable TokenExchange Flow (Checked)
- Refresh token is valid until revoked
- Save the settings
Part 5: Enable App and Retrieve Consumer Key/Secret
Scroll up the page and Enable the App
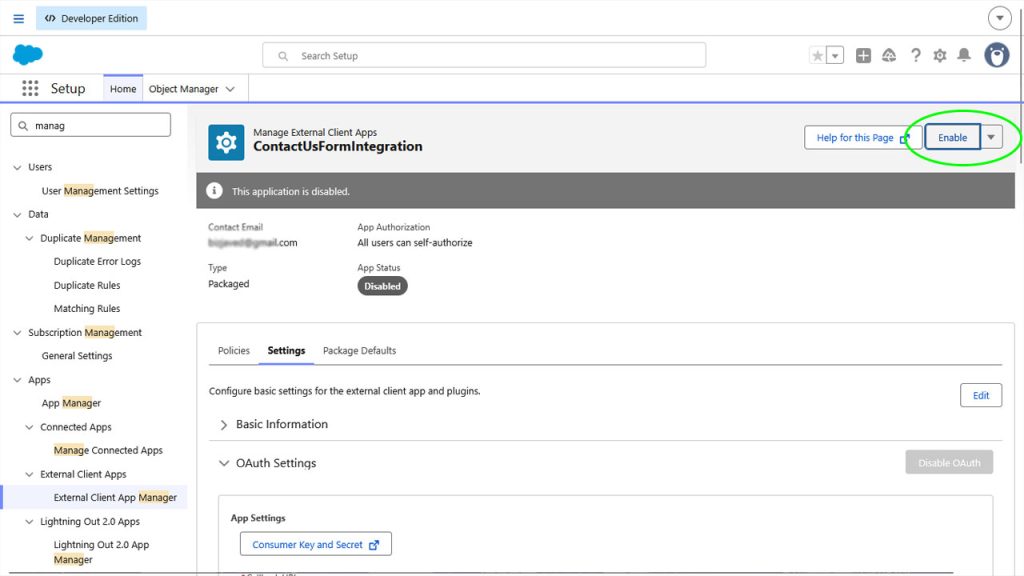
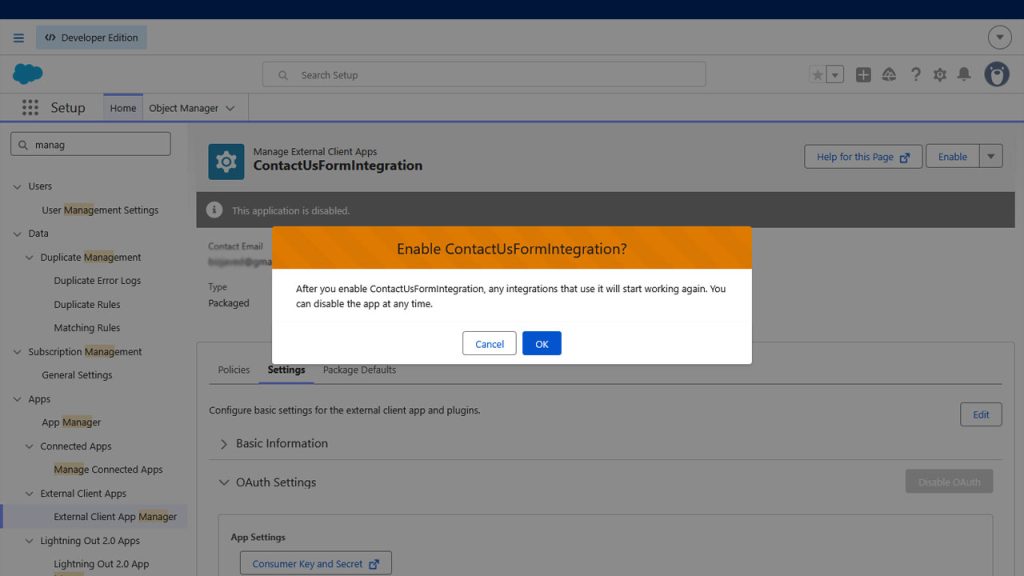
Go to Settings tab and expand OAuthSettings. Make sure the app status is enabled. Click “Consumer Key and Secret” button.
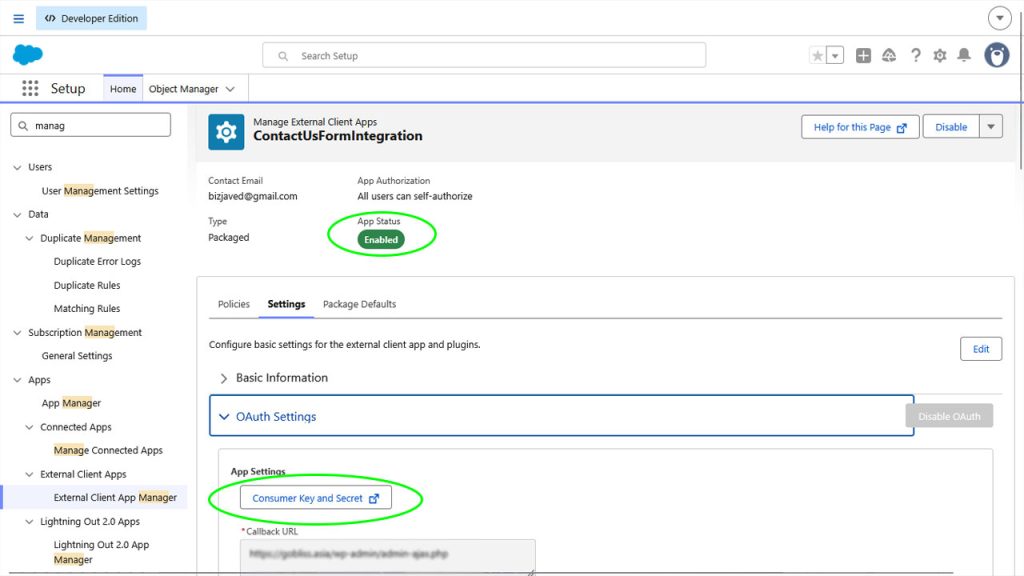
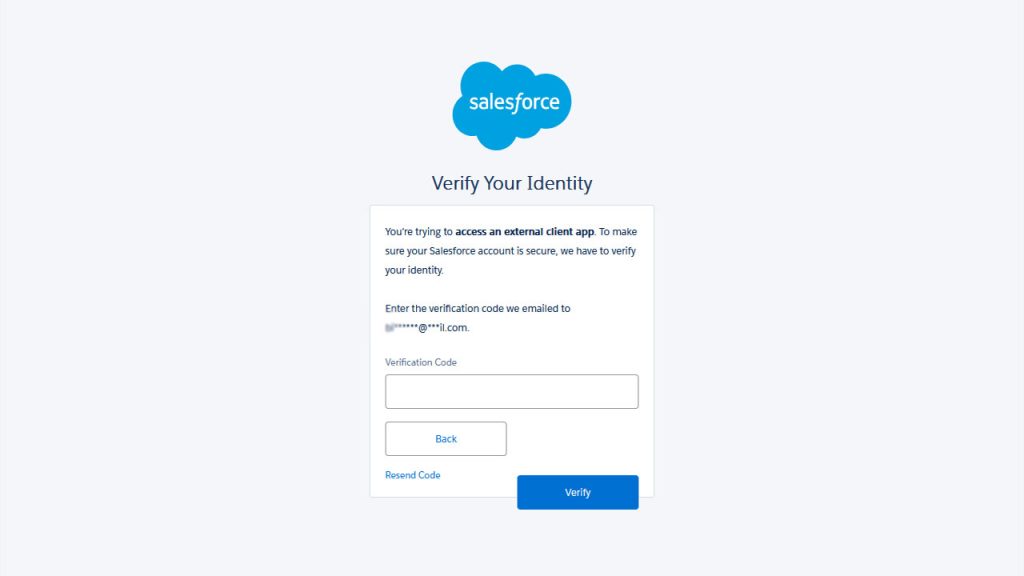
The following page will appear, and you will receive a verification code by your registered email. Enter the verification code and verify.
You will see the consumer secret and keys appearing like this:
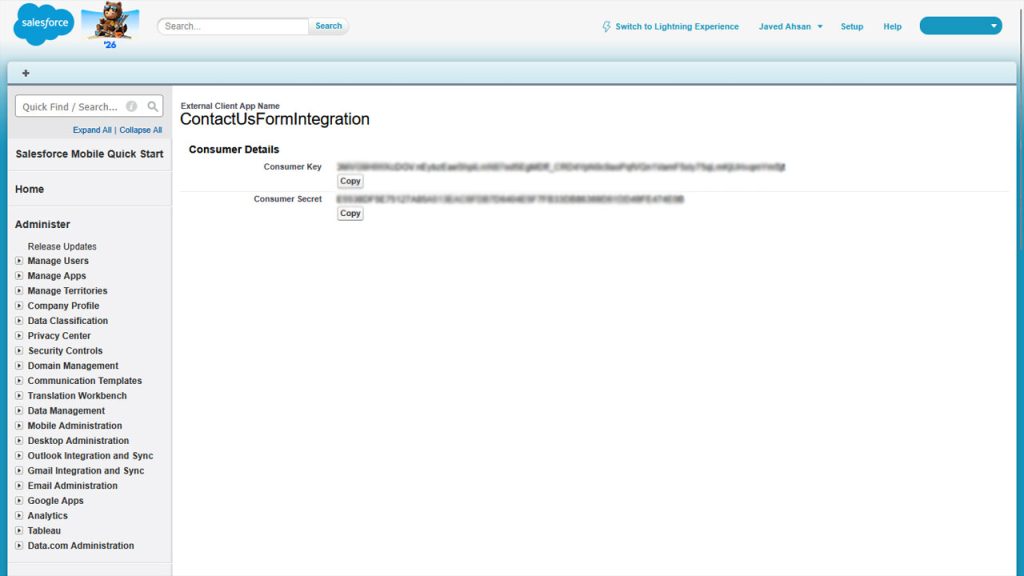
Now your External Client on Salesforce is up and running. This is a time to grab the consumer key and consumer secret. Do not close this page.
Part 6: Connect Salesforce in ContactIn Pro
Go to ContactIn Pro -> CRM Integration -> Salesforce Tab -> Salesforce OAuth Configuration
Copy the Consumer Key and Consumer Secret from the Salesforce and paste here. Click “Connect to Salesforce” button. The ContactIn Pro will perform a headless integration with the Salesforce Instance through API endpoint.
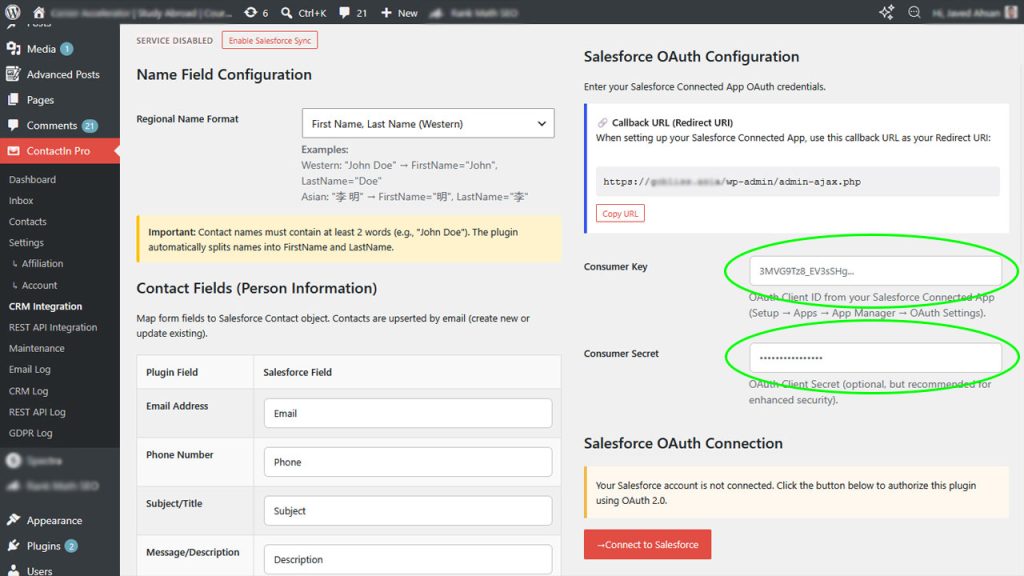
It will take a while. Once salesforce is successfully connected. You will see Instance and Endpoint details.
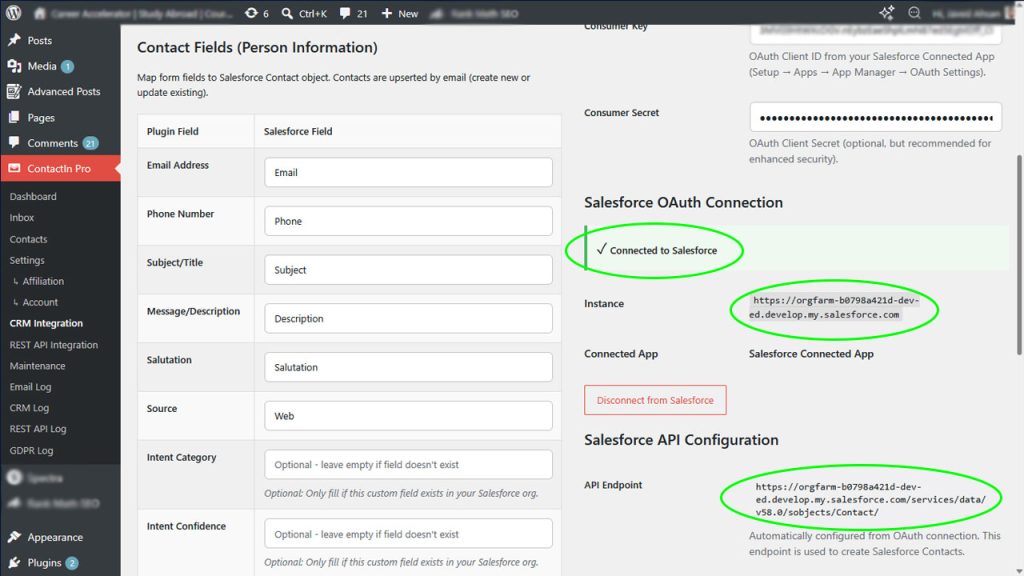
Your WordPress Salesforce integration is now authenticated and ready for field mapping.
Part 7: Configure Name and Field Mapping
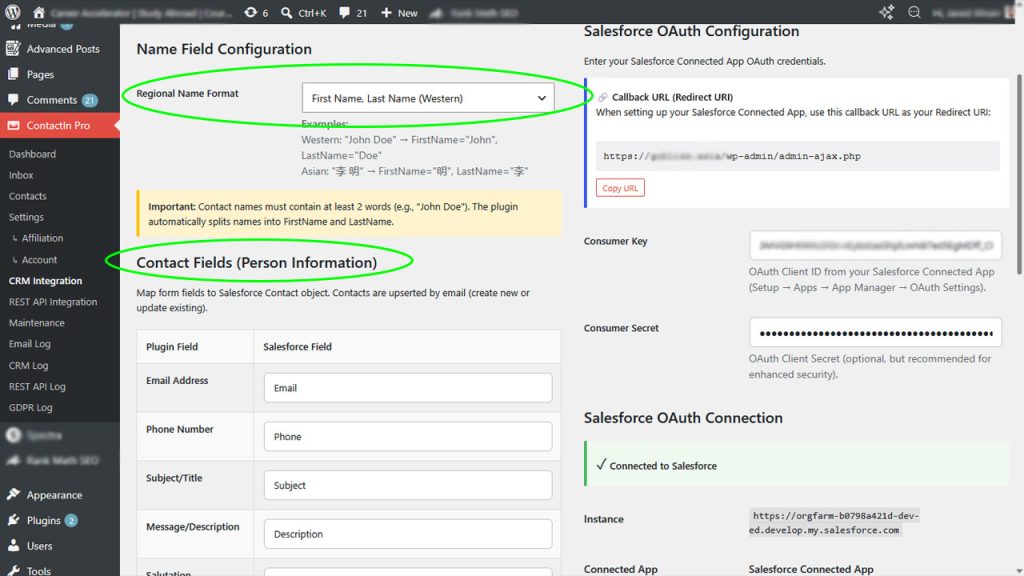
Under the Name Field Configuration, you can Select Regional Name format. Under the Contact Fields (Person Information), you can change field mappings with the Salesforce. This should be done by a trained Salesforce integrator.
Do not change anything that you do not understand as all the default settings are carefully used to let you start Salesforce sync using headless configuration.
Part 8: Configure Optional Sync Behaviors
You can change the following configurations:
- Enable “Upload form attachments to Salesforce.” When enabled, files uploaded with submissions are queued and attached to the Salesforce Case/Task record.
- Enable “Delete CRM records when contacts are deleted.” When enabled, GDPR deletions will also delete related Salesforce records (Contact and restricted child records).
- Enable “Prepend intent category to Case/Task subject.” Useful when you don’t have custom intent fields and want to see classification in the subject line. Example: “Looking to buy a private jet” becomes “Sales: Looking to buy a private jet”
Part 9: Enable Salesforce Sync
Save Integration Settings. Scroll up the page and enable “Salesforce Sync.”
Once enabled, you will see the status changed
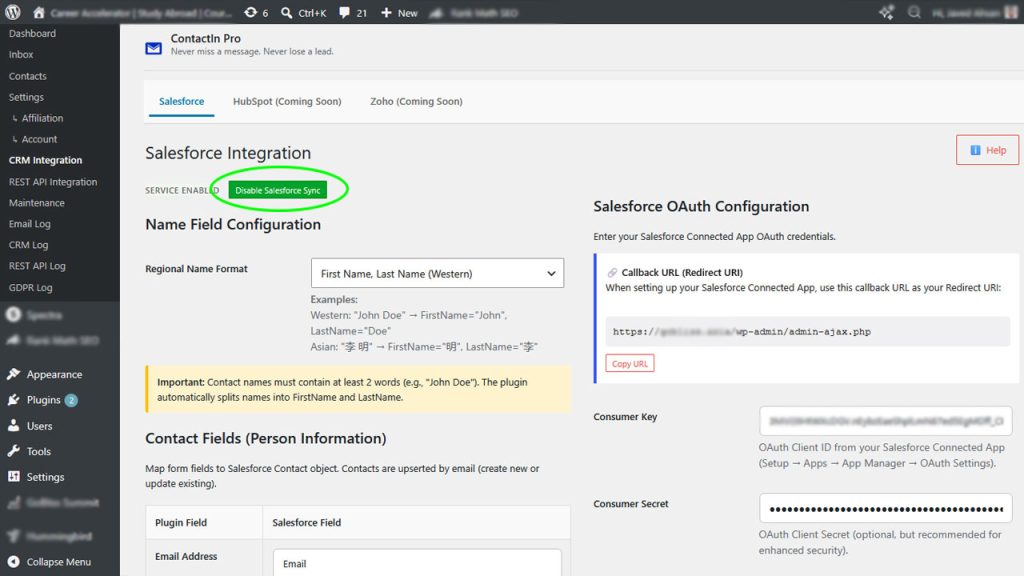
WordPress Salesforce integration is now active on your site.
Part 10: Validate in Salesforce Login Context
Go to the Salesforce Login Portal
Log in with Salesforce credentials
Test It
Part 1: Submit a Test Inquiry
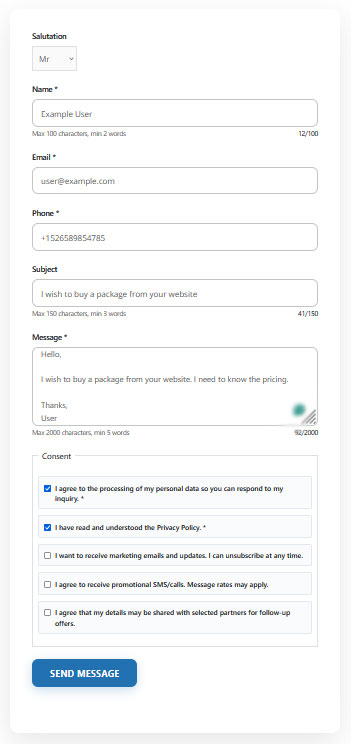
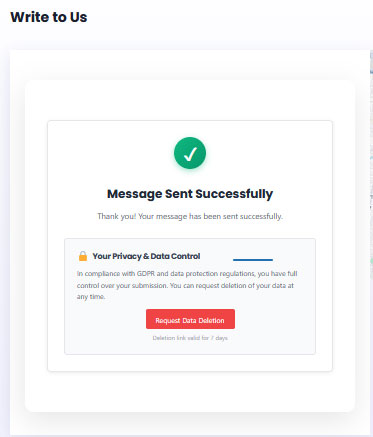
Go to a page that embedded the ContactinPro using shortcode, Gutenberg or Elementor block. And fill an inquiry.
Part 2: Verify Sync in WordPress
Go to ContactIn Pro -> Inbox. Check if the message is synced with the Salesforce. This may take a short while as the sync runs through managed queue.
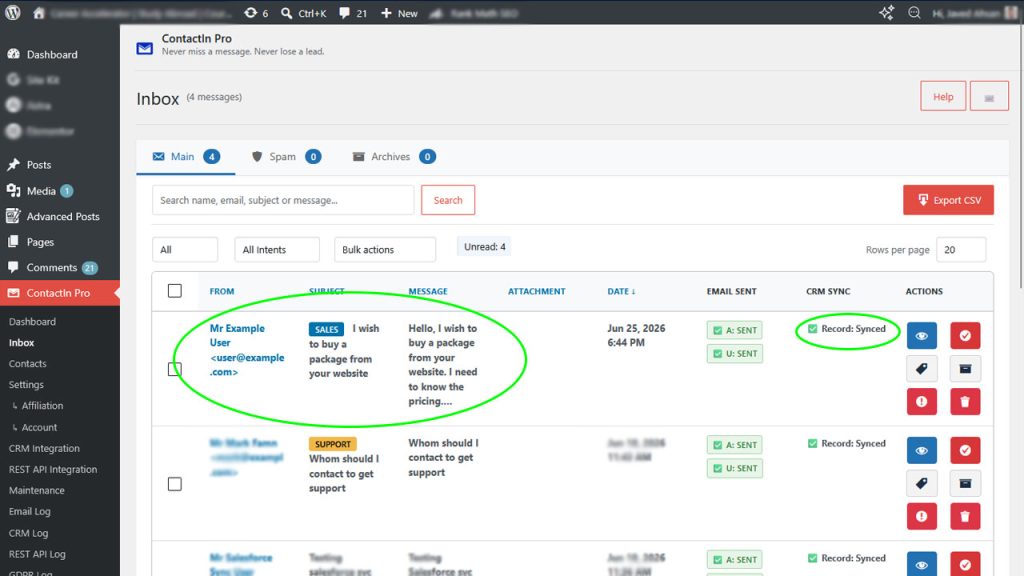
Part 3: Verify Record in Salesforce
Log back into your Salesforce Dashboard.
On the main search, type “cases” A drop-down will appear, click “my cases”
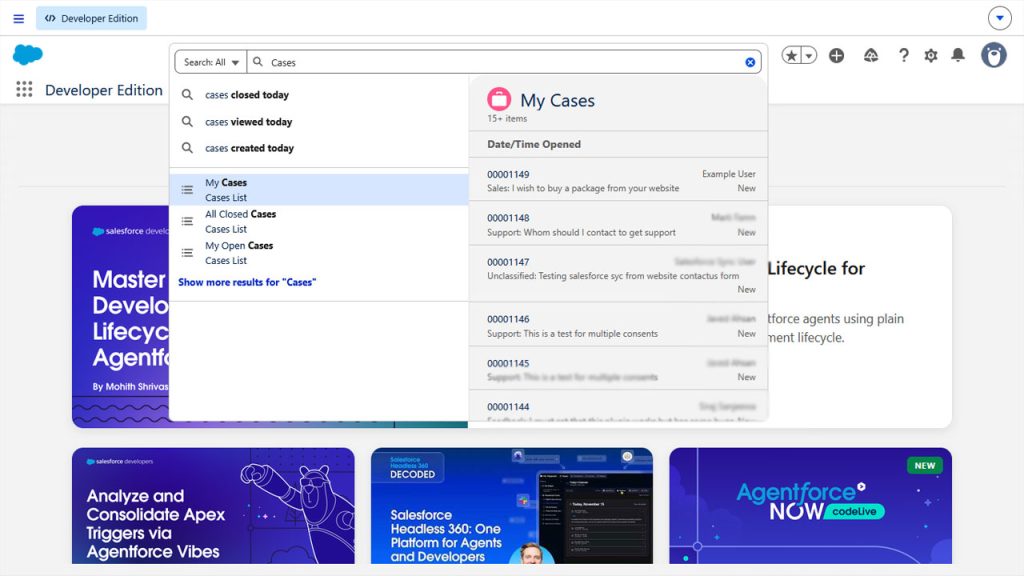
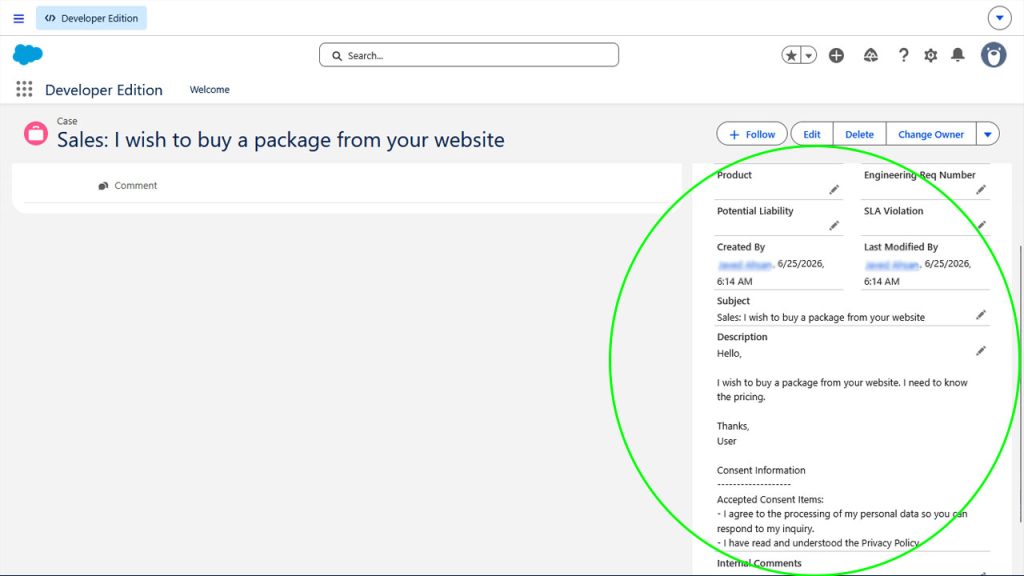
You can see the Contact Form inquiry registered as a case in the Salesforce
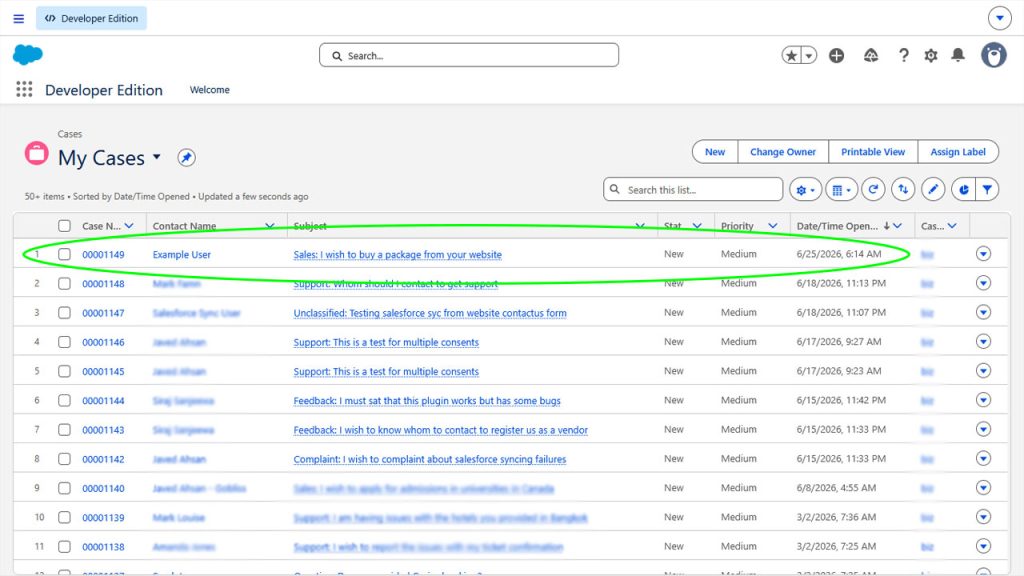
Click on the Case to see details
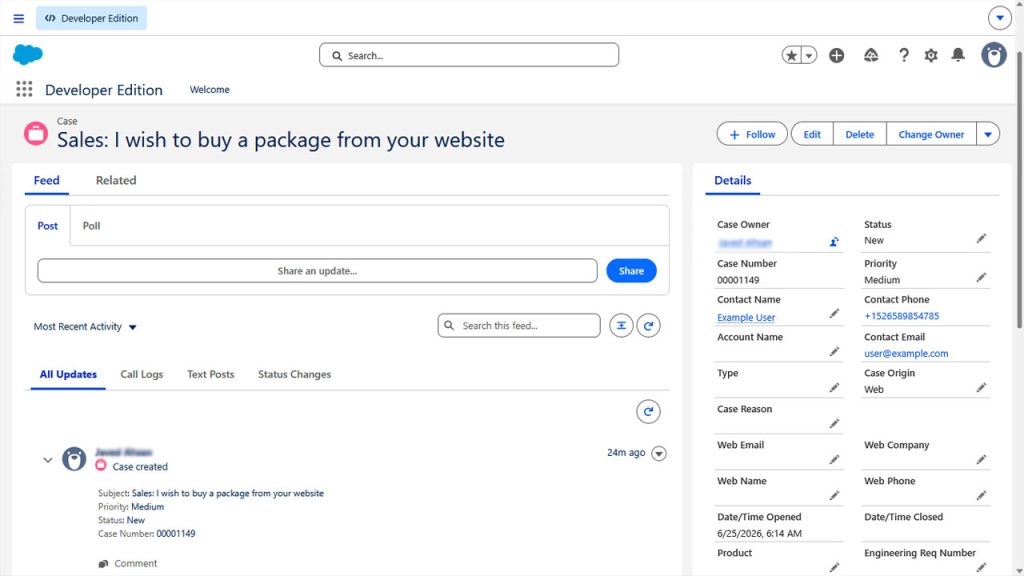
Part 4: Verify Contact Update Behavior
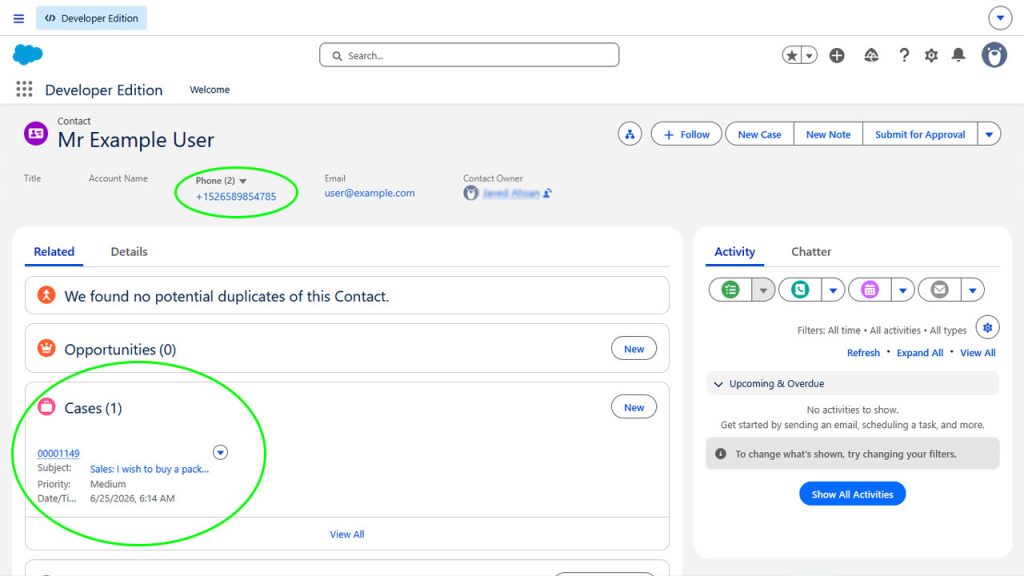
You can also check contacts details. In this case, contact (Mr Example User) did exist in the Salesforce, so a new phone number (+1526589854785) entered in the form is added to the contact. Otherwise a fresh contact was added, and then a new case under that contact.
Congratulations! Your WordPress Salesforce integration is now live and syncing real submissions to Salesforce through ContactIn Pro’s managed queue.
Your WordPress Salesforce integration is confirmed working end-to-end.
Troubleshooting
Use these fixes to resolve common WordPress Salesforce integration issues.
Connection Issues
Most WordPress Salesforce integration failures are OAuth-related.
OAuth connection fails
Re-check the Connected App callback URL and re-authorize from ContactIn Pro.
401 Unauthorized or token errors
Access token expired or revoked; re-authorize Salesforce connection.
Field and Data Issues
Contact created, but some fields are empty
Field mapping uses wrong Salesforce API names; update mappings with exact API field names.
Duplicate contacts in Salesforce
Confirm email mapping is correct and consistently populated in form submissions.
Sync Performance
Sync failures or delays
Check CRM queue/logs in ContactIn Pro and retry failed/DLQ items.
Attachments
Attachments not syncing
Confirm attachment sync is enabled and file size/visibility settings are valid.
Frequently Asked Questions
Free Technical Support
Get help with your WordPress Salesforce integration from our support team.
Need help with your WordPress Salesforce integration setup? Visit the Contact Us page and describe your issue. Our team offers free support for all WordPress Salesforce integration users.